

The Problem: Drowning in Paper Plans and Manual Processes
Construction projects thrive or fail on communication and document accuracy. Yet too many crews are still juggling paper plans, emailed markups, and inconsistent RFI workflows. The result? Confusion in the field, outdated plans, and costly mistakes when the wrong version gets built.
That’s where Bluebeam Revu comes in. For builders, architects, and subcontractors, it’s the gold standard for digital markups, RFIs, and project document control.
4 Ways to Get More Out of Bluebeam Revu
1. Custom Tool Chests & Profiles for Field Teams
Instead of every user making their own markups or using inconsistent symbols, you can build custom tool chests that match your company’s standards.
For example:
- Use a standardized “Electrical RFI” cloud + text callout (as one reusable tool).
- Create the markup once: Draw a Cloud around an area, then add a Callout (Tools → Markup → Callout).
- Style it: With the markup selected, open Properties (right panel) → set Color, Line Width, Text style, and Subject (e.g., “Electrical RFI”).
- Group it: Select both the cloud and callout → Ctrl+G (or Right-click → Group).
- Save to Tool Chest: Right-click the grouped markup → Add to Tool Chest → pick your Tool Set.
- Make it consistent: In the Tool Chest, right-click the new tool → Set as Default Properties (optional). Now everyone can place the same, consistent RFI markup in seconds.
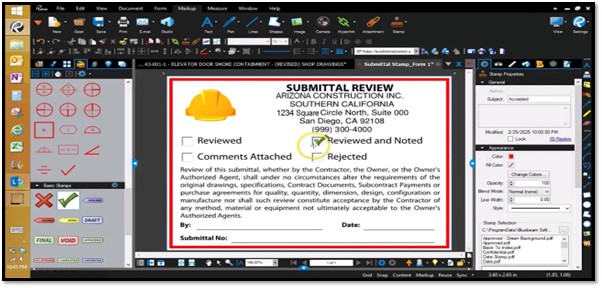
- Add a company branded stamp for “Reviewed” or “Needs Correction.”
-
- Create stamp: Tools → Stamp → Create Stamp (or Manage Stamps → New).
- Design: Add company logo/image, text (e.g., “Reviewed by,” Date, Project #).
- Dynamic fields (optional): Insert date/time/user fields if available in your version.
- Save & organize: Save the stamp to your Stamp library.
- Use it: Tools → Stamp → pick your new stamp → place on the sheet. (You can also add it to a Tool Set for quick access.)
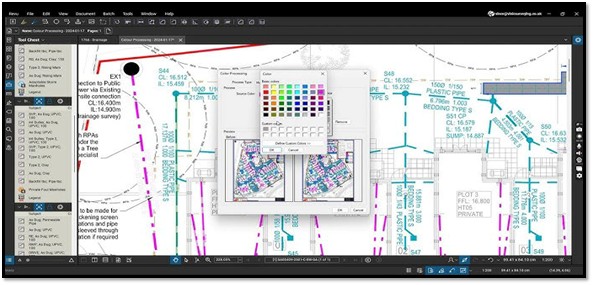
- Set up custom line weights and colors for specific trades.
-
- Place a sample markup (e.g., Cloud or Polyline).
- Set appearance: Properties → choose Color (e.g., Electrical = Orange, Mechanical = Blue), Line Width, and Opacity.
- Lock scale (if needed): In Properties, enable Lock or Scale settings so symbols stay consistent.
- Save to Tool Chest: Right-click → Add to Tool Chest → choose trade’s Tool Set (e.g., “Electrical”).
- Shareable standard: Right-click tool in Tool Chest → Properties → set Subject (trade name) so Markups List remains clean.
Real-World Example: A framing contractor we worked with created a custom profile for their superintendents. It included pre-built markup tools for common framing issues (e.g., wall bracing adjustments). What once took minutes of redlining now takes seconds and looks consistent across every project.
2. Batch Compare Drawings (New vs. Old Plans)
One of Bluebeam’s most powerful features is the ability to batch compare drawings. With a few clicks, you can overlay two plan sets and instantly see changes highlighted in color.
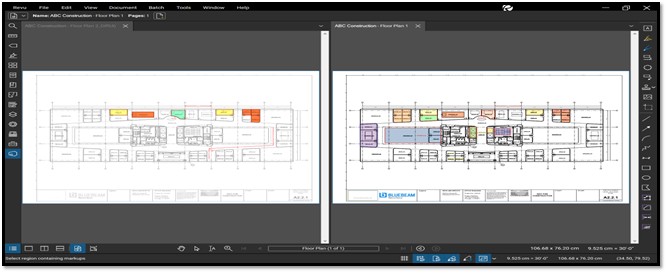
Why It matters:
- Quickly identify scope changes between revisions.
- Catch discrepancies before subs mobilize.
- Reduce rework caused by outdated drawings.
Real-World Example: A roofing contractor compared two sets of mechanical drawings in Bluebeam and caught a last-minute rooftop unit relocation. They avoided a costly field correction that would’ve delayed the project by days.
3. Digital Signatures & Document Control Workflows
Bluebeam isn’t just for markups, it can be used to digitally sign documents and create a streamlined approval workflow.
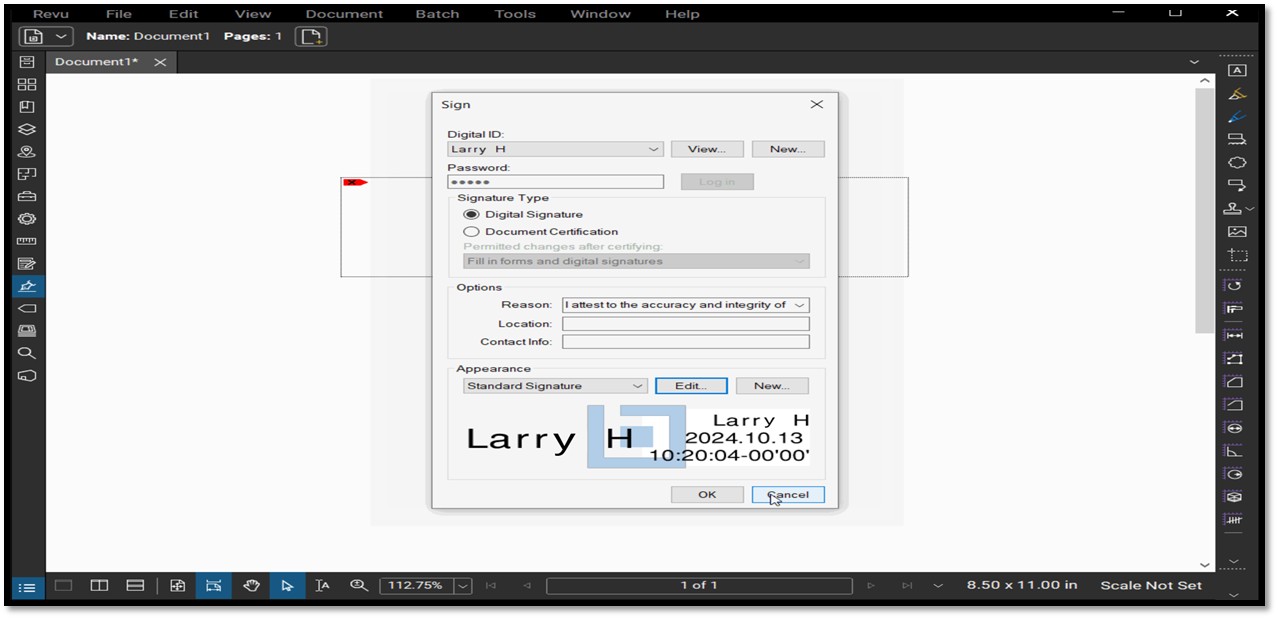
- Add secure digital signatures to RFIs, submittals, or contracts.
- Automate workflows so documents move from superintendent → PM → client for approval.
- Use Studio Projects for centralized version control.
Pro Tip: Pair this with SharePoint or OneDrive integration (see below) to ensure only the latest version is in circulation.
4. Integrating with SharePoint/OneDrive for Version Control
Too many teams use Bluebeam locally, saving files to desktops or email threads. That’s risky. By integrating Bluebeam with SharePoint or OneDrive, you can:
- Store all project PDFs in a secure, central hub.
- Enable versioning so only the latest plan set is used.
- Give field teams instant access via tablets.
Real-World Example: A mid-sized subcontractor we support used to email plans back and forth. After integrating Bluebeam with SharePoint, crews now open the same central file. No more “Which version is right?”, everyone’s on the same page (literally).
Additional Features You Might Not Know About
Even experienced users often overlook these Bluebeam tools:
- Legends: Auto-generate a legend of all markup symbols used on a drawing.
-
- Open Tool Chest panel → click the gear next to your tool set → Create Legend.
- Click on the sheet to place it; Revu builds a legend of the tools used.
- Properties panel → format columns (e.g., count, subject, comment).
- Update markups → Right-click Legend → Update Legend.
- Quantity Link: Connect PDF markups directly to Excel for live material counts.
-
- In Excel, go to the Bluebeam tab → Quantity Link → Create Link.
- Pick your PDF and measurement markups (area/length/count) to link.
- Choose target cells in Excel; finish the Link wizard.
- When measurements change in Revu, refresh in Excel to update totals.
- Batch Slip Sheet: Quickly insert revised sheets into a full set without breaking bookmarks.
-
- Batch → Slip Sheet.
- Add the Current Set (existing PDF) and Revised Set (new pages).
- Choose Match By (Page Label, Page Region, or File Name).
- Pick options (e.g., Insert Before/After, Replace, Carry Over Bookmarks/Links).
- Run your set updates without breaking navigation.
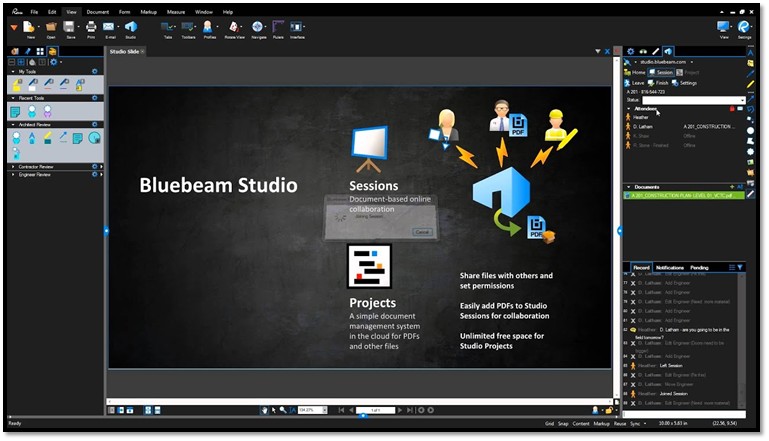
- Studio Sessions: Real-time collaboration across offices and job sites, even with external partners.
-
- Open Studio (right panel) → Sign In → Start a Session.
- Add PDFs and Invite users (email).
- Set permissions (save/print/markup).
- Collaborate in real time; Revu logs who did what and when.
- (Tip: Use Studio Projects for document management/versioning; Sessions are for live markups and reviews.)
Tiny but mighty pro-tips
- Markups List filters: Filter by Subject/Author/Color to create trade-specific review views.
- Tool Chest “Detail” mode: Shows tool names—standardize these so the Markups List stays readable.
- Flatten with layers: Document → Flatten; preserve Layer info so viewers can toggle markup visibility.
Still using Bluebeam like it’s just a PDF viewer? You’re leaving productivity (and profit) on the table.
At Computer Dimensions, help Arizona builders and construction teams set up custom profiles, integrated workflows, and version control to make Bluebeam a true project collaboration hub.
Book a free jobsite productivity consultation to see how your crews can use Bluebeam smarter.
Let’s Build Together!
Book a Free Productivity Consultation Review with our experts.
